Sometimes, we experience connectivity problems, unstable internet connection, or we need to switch to a different cellular network. A common solution to these scenarios is changing a SIM card.
SIM cards enable you to get on your cellular carrier to help you get data services and make phone calls. It is the key to getting online without a Wi-Fi connection. Normally, you don't need to change SIM card. But, when you travel internationally, you'll need to change the local SIM to save money. Or you can switch phone carriers to get a good connection. In these situations, it's important to know how to change a SIM card on iPhone.
Anyway, you can easily replace a SIM card on iPhone since we'll show you all the details in the process. Keep on reading to make the change will go smoothly.
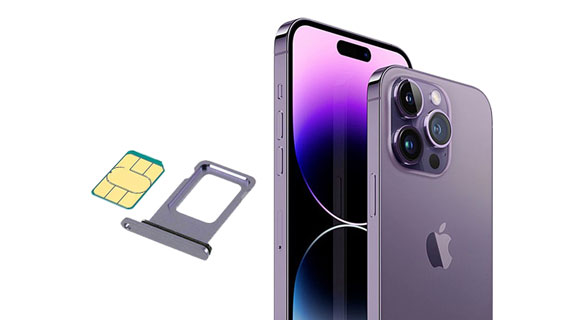
Q1. Will I lose data if I change SIM Card on iPhone?
No. You won't lose anything when you change SIM card provided you've backed up the data on the SIM card. But, if you switch to another carrier or plan, you'll have to reconfigure the network settings. Most mobile phone carriers will send a text message with the settings you require to save and allow you to access the mobile network, including mobile hotspots.
Q2. Does switching SIM cards on iPhone transfer everything?
No. It'll transfer only contacts that are stored in the SIM card. Apps, photos, messages, and other files will remain on your iPhone.
Before you swap a SIM card that's in an iPhone with another one, there are some things you want to check. This will help ensure your files don't get lost. Here is what to do before changing a SIM card on iPhone:
Before you change a SIM card on your iPhone, check if the device is locked to a network. Most iOS devices are always locked to a particular carrier, making it impossible for the users to use another carrier's SIM on the device. Here is a procedure to check whether an iPhone is locked to a network:
Step 1: Head to Settings on your iPhone, click "General", and choose "About".
Step 2: Scroll down on the About page to "Carrier Lock" and check if the iPhone is locked to a carrier.
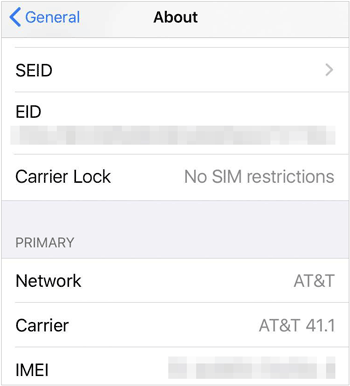
If the iPhone is locked to a network, you should contact the carrier to unlock it and explain why you are changing your SIM card. You can also use a third-party network unlocking tool to unlock it.
Maybe you need: Easily Unlock SIM Card on Android Devices
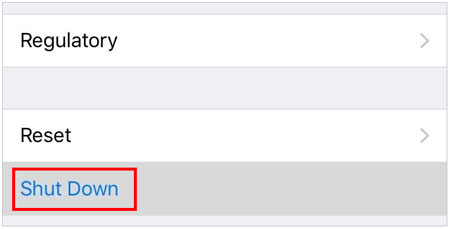
To protect the SIM card and avoid software anomalies, you should switch off the iPhone first before changing the SIM card on an iPhone.
To switch off the iPhone, head to the Settings application and click "General", and choose "Shut Down" to switch off the iPhone.
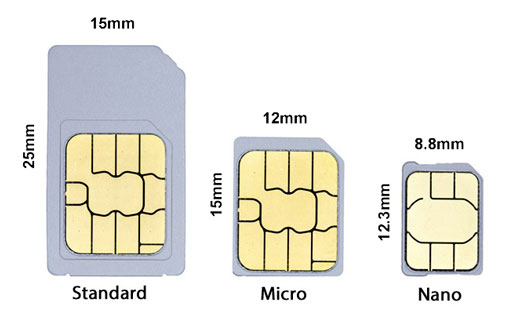
Most iPhone models use Nano SIMs. So, ensure you check the type of SIM card before you buy it. If your SIM is incompatible with the iPhone, you should connect to the cellular provider and get the nano SIM. If you switch your SIM card to a new iPhone, the SIM card size should be nano because Apple started using nano SIM with iPhone 5.
If you always store the contacts in a SIM card, you should transfer them to the iPhone. To do that, head to Settings and "Contacts", then click on "Import SIM Contacts" to move the contacts to the iPhone. This way, you'll not lose the contacts after changing the SIM card.
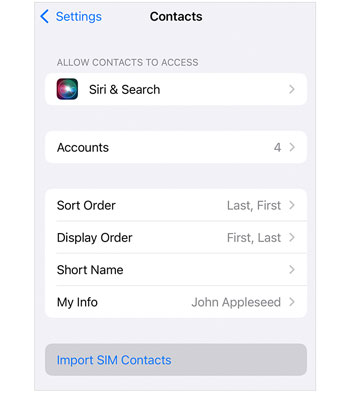
Even though no data is directly involved when changing a SIM card, it is ideal to back up your data to prevent losing important information. To do this, connect the iPhone device to the computer and use iTunes to create the backup. Also, you can use iCloud or a professional backup tool to back up your files. If you want to restore contacts files onto the new SIM, you can freely do so.
Read also: How can you fast transfer your text messages from your iPhone to a computer? Learn a flexible way from this guide.
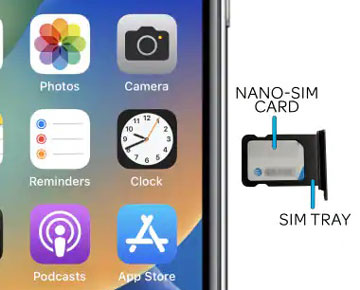
To move SIM card to a new iPhone, you'll require an ejector tool to help remove the card tray from your device. You can find the tool in the original box of Apple's device. If you cannot find it there, you may use a paperclip. You just insert it into a hole on the side of your iPhone till it sticks out. Alternatively, you may use any pin to insert in the card tray hole. iPhone 11 or earlier models have the card tray on the right side, iPhone 12 or up models have the tray on the left side, and iPhone 14 or models purchased in the US have no SIM tray. They use eSIMs.
Step 1. Remove the Card Tray
Insert a SIM card ejector tool into a hole on the side of the iPhone, then push inward. Be careful not to damage it. Keep pressing with small pressure until the tray pops out from the device.
Step 2. Insert a New SIM Card
Pull out the SIM tray, then remove the original SIM. Now put your new SIM into the card tray in its correct position and ensure to set it right.
Step 3. Insert the Card Tray Back Into Your iPhone
After correctly inserting the SIM into the card tray, insert it into your device in the correct orientation. If your SIM is active and is supported by the iPhone, your iPhone should get the SIM service. If there's no service, you can still remove your SIM and clean it. After that, insert it into the phone.
Further reading: 11 Excellent Options for iPhone Transfer Software
As mentioned above, to ensure your files will be safe when switching SIMs on iPhone, you would better back up your data to a computer. If you want a backup program that can restore your data without losing your current data, please choose iOS Backup. It is the best tool to help you transfer data from iOS to your computer for backup. Unlike iCloud backup, which needs a network, this tool can back up your iOS data offline. And you can view your backup data on your computer at any time.
This professional tool streamlines the processes and makes it easier to export music, books, contacts, photos, videos, etc., from iOS to your computer. Moreover, it lets you uninstall or remove unwanted applications from iOS devices in 1 click. You don't need technical skills to use this tool as it has a very intuitive interface and is easy to use.
Download this iPhone backup software.
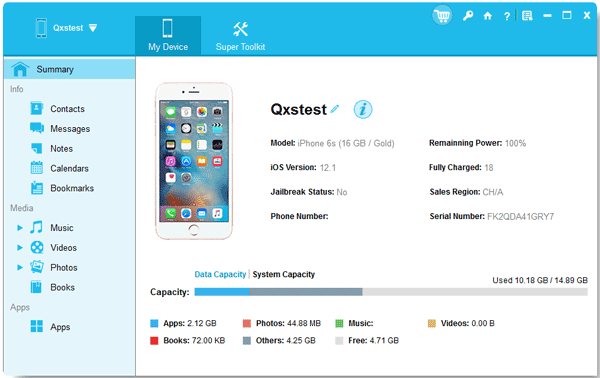
Step 1: Download the correct version of this software. Launch it to reach the primary interface. Now connect your iPhone to the computer with a working USB cord.
Step 2: The tool will detect the linked device, and a popup window will show on the PC. Click "Trust" to trust the computer and hit "Continue".
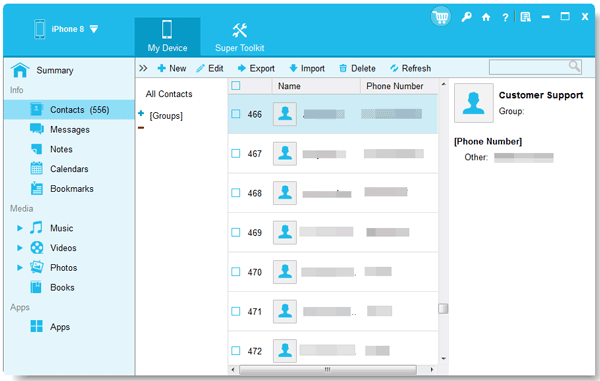
Step 3: Choose the files to transfer. Preview the detailed information as you choose the items to transfer. When done, tap the "Export" option, and all your files will be transferred.
That's all about how to change an iPhone SIM card. It is a straightforward process and helps address connectivity problems and enhance network performance. The steps mentioned above will help you safely replace the SIM without complications. However, ensure you prepare before the SIM card replacement iPhone. After that, you can replace your SIM card on your iPhone without any trouble and stay connected wherever you go.
To keep your iPhone data safe, you can back them up to your computer with the iOS Backup software. This tool allows you to preview and select files before the backup. You can back up all the files you want without restriction.
Related Articles
Fast Transfer Contacts from iPhone to Android [6 Ways You'd Better Know]
Apps Didn't Transfer to New iPhone? Fix the Issue in Pragmatic Ways
[6 Ultimate Ways] How to AirDrop from iPhone to Android?
How to Transfer Samsung Notes to iPhone in 5 Simple Ways?
How to Print Out Text Messages for Court from Your Android Phone and iPhone
How to Import Photos from iPhone to HP Laptop with 7 Trustworthy Methods
Copyright © samsung-messages-backup.com All Rights Reserved.