Once an Android phone or tablet gets bricked, it cannot perform properly, or even you cannot turn it on. But it doesn't mean that it will be a brick forever. In many cases, you can unbrick the Android device with useful tips. This is one of the points that we will talk about.
Furthermore, we have summarized the main reasons for Android bricking before repairing bricked Android devices, which is helpful for you to choose a suitable way to unbrick your device. Plus, you can get effective tips to avoid bricking your Android tablet and smartphone.
Multiple reasons will lead to a bricked Android device. Simply put, when you do something improper on your Android OS, your mobile device might be bricked. For example:
- Flashed an improper ROM on your Android device.
- Rooted your Android handset with wrong steps.
- Damaged firmware.
- Accidentally installed malware.
- Removed important system files from the File Manager.
Tips: What are hard brick and soft brick on Android? Generally, if a bricked Android phone won't be turned on, it is probably the hard brick. The only solution is to send your device to a repair service store. A soft brick often means that the Android device gets into recovery mode or is stuck at the boot-loop screen. Although it cannot turn on normally, you can cope with the soft brick.
See also: You can follow this guide to transfer SIM card data to your computer for backup without effort.
Now you can learn what to do if you brick your Android tablet or cellphone in this part.
Android Repair can repair multiple kinds of Android system issues, such as bricking an Android device, getting stuck in a boot loop, black screen, apps crashing, and more. What's more, you can recover the bricked Android phone with simple clicks instead of complicated skills.
Additionally, this program supports many Android OSes, from Android 2.1 to the upper. Thus, it works on Samsung Galaxy S20 Ultra/S20/S10/S9/S8/S7/A9s/A90/A8s, Galaxy Note 20 Ultra/Note 20/Note 10/Note 9/Note 8/Note 7, etc.
Follow the guide to unbrick an Android tablet with this Android repair software:
Step 1. Download the Unbricking Android Phone Software
Please download and install this software on your Windows PC. Then launch it and choose the "System Repair" module.
Step 2. Connect the Bricked Android Device to the Computer
- Use a USB cable to link your bricked phone to your computer, and choose the "System Repair" option from the interface.
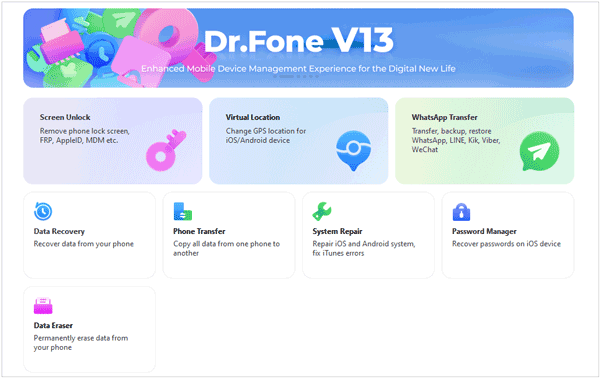
- Click the "Start" icon to select the correct information of your bricked phone, and tap the "Next" icon. Then type 000000 on the prompt for confirmation. The software will erase all the data from your phone.
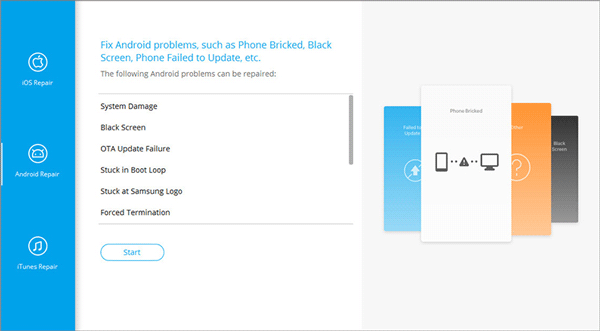
Step 3. Fix Your Bricked Android Phone
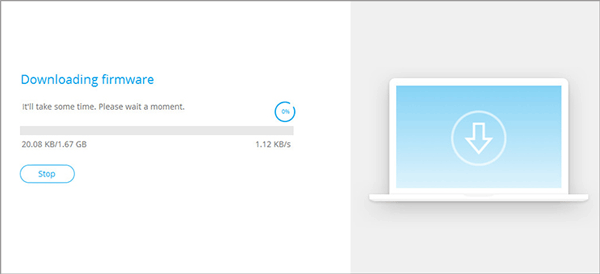
- To fix the bricked Android phone, please follow the gestures on the interface to get your phone into Download mode.
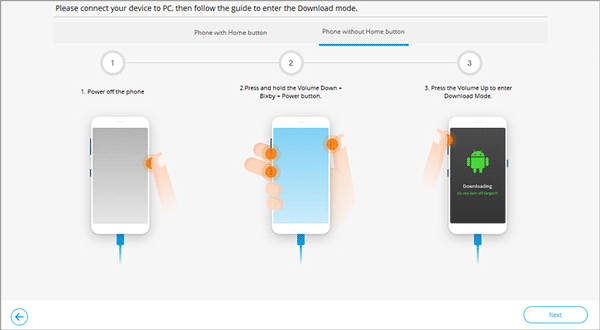
- Then click the "Next" icon to begin the repairing process. Once done, you can power on your Android phone without the hassle.
Further learning:
Here are 5 powerful Android phone repair tools for your reference. You can select one directly.
Can you mirror your iPhone to an iPad? If you want to do it but are confused about the operation, click this link.
You can manually factory reset a bricked Android phone or tablet using the recovery mode. But please note that the operation will vary according to different Android models. Hence, you can ask the manufacturer for help before unbricking your phone. By the way, please charge your phone at least 50% of the battery power.
Here's how to factory reset a bricked Android phone via the recovery mode:
Step 1. Enter Recovery Mode
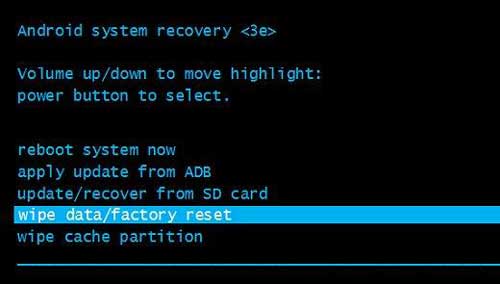
Turn off your bricked phone, press and hold the Volume Up and Power buttons at the same time. Then release them when you see the Android robot on the screen.
Step 2. Choose the Factory Reset Option
Use the Volume keys to select the "Wipe data/factory reset" option, and hit the Power button to confirm it.
Step 3. Start the Reset to Unbrick the Android Device
Opt for the "Factory data reset" feature. After a while, please choose the "Reboot system now" option to power on your mobile device. Finally, it will be recovered.
You can also utilize other practical tips to fix your bricked Android phone or tablet.
1. Remove Battery
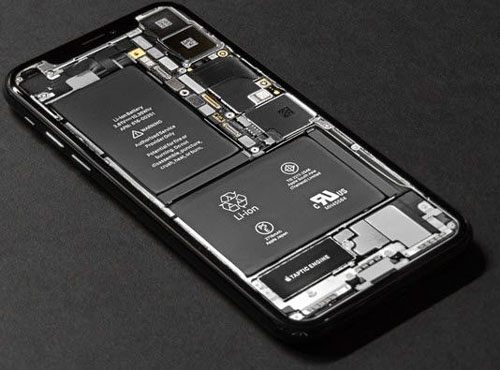
If the battery on the bricked phone is removable, please open the back, and take out the battery. Then reinstall the battery carefully, and try rebooting your device. However, please don't dismantle the battery if it is non-detachable.
2. Ask Manufacturer for Help
You can get online help from the official website of your Android device. Universally, you can find some related how-to guides on the website, and follow them to fix your bricked Android phone. Plus, there are manual services that you can choose from. You can contact the manufacturer via online chats, emails, and having a call.
3. Go to Phone Repair Store
If you fail to fix your bricked Android tablet on your own, please go to a reliable phone repair store. Professional maintenance personnel can help you repair the device without damages. By the way, erasing data is necessary for system repair.
Read also: Want to transfer groups of songs from one Android device to another? You can try these 5 approaches.
The best way to avoid bricking your Android phone or tablet is to use the OS released officially, and install the apps from the secure app store. An incompatible OS will result in some bugs or freeze a mobile device. In addition, please carefully root your Android device if needed, use a safe rooting app, and do not delete system files randomly.
It is feasible to unbrick Android devices by yourself, especially when you use the Android Repair Software. This program can effectively unbrick an Android tablet or phone using a PC, and it can also repair other system issues securely, like boot loop, black/blue/white screen, system stuck, and so on. However, fixing a bricked phone will eliminate all data on the device, which is inevitable. Therefore, please back up your Android data preventively.
Related Articles
[Fixed!] What If Fail to Connect Android to PC
How to Fix Samsung Smart Switch Not Working?
Samsung Phone Keeps Restarting? Easily Fix It with 10 Solutions
Clean Junk Files on Android with 5 Hassle-free Methods [Newest Guide]
[Best Guide]How to Delete Photos from Android Phone Permanently in 4 Ways
Adroitly Move Data from Android to iPhone after Setup [6 Methods]
Copyright © samsung-messages-backup.com All Rights Reserved.