People love taking pictures with their iPhones as the images usually come out beautiful, all thanks to the iPhone's amazing technology. But photos take more space when updated, and you may start getting no storage space notifications. So, you may transfer your pictures to the USB drive and delete them from your iPhone to free up storage space.
Transferring photos to a flash drive is a wonderful idea, as you will not experience data loss unless the flash gets damaged. If you've got essential images on your iPhone, you may create a backup in a flash drive and keep all of your photos there.
The best part is that the flash drive comes with larger storage and is easier to carry around. But how do you transfer photos from iPhone to a flash drive? Even though an iPhone doesn't have a USB port to connect a flash drive directly, there are still other ways to go around this situation. Read on to know how.
If you want a fast and safer way of transferring pictures from an iPhone to a USB drive, this iPhone Transfer is your option. The transfer process is very easy; no skills are needed. Just connect your flash drive and start transferring your photos. Furthermore, in addition to photos, it can transfer videos, contacts, notes, and many more. If needed, you can back up your iPhone data to a computer with it.
- Allow you to preview your photos before transferring it with just 1 click.
- No quality loss in transferring pictures to the flash drive.
- Enable you to remove those unwanted images at once.
- Help you manage your iPhone contacts and other data types with multiple features.
- Supports most generations of iOS devices, such as iPhone 14 Pro, iPhone 14 Pro Max, iPhone 14, iPhone 14 Plus, iPhone 13/12/11/X/XS/XR, iPad Pro, iPad mini, iPad Air, iPod touch series, etc.
- 1-click back up and restore data between iPhone and iTunes default folder on your computer.
- Compatible with Windows XP/Vista, 7,8,9,10, 11.
Download this iPhone data transfer below.
Step 1. Launch the Program on the Computer
Install this software on your computer and launch it on the desktop.
Step 2. Connect Your iPhone Device and Flash Drive to the Computer
Connect your iPhone with a working USB cable to the computer and recognize it by choosing the "Trust" option. Once done, insert your flash drive into a computer's USB port. Then you'll see the main interface showing all data on your iPhone device.
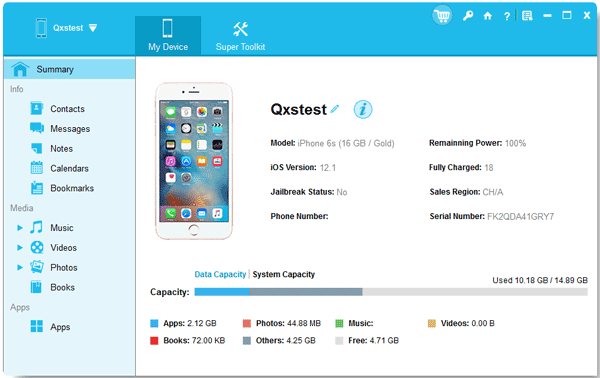
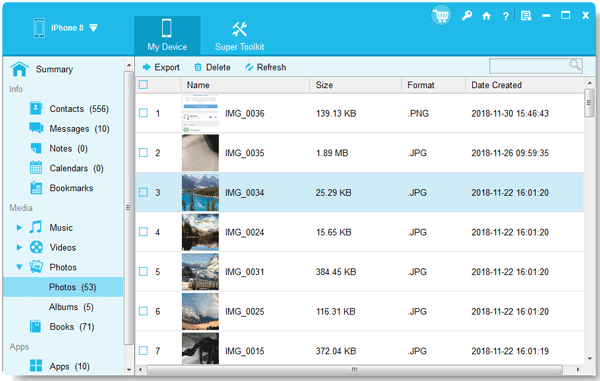
Step 3. Export Photos from iPhone to the USB Stick
Look for the photos option situated in the left panel. Preview while choosing those to transfer. Click the "Export" button on the top menu and select your USB drive as the destination to save the pictures.
Bonus: Want to copy Android photos to your Windows 10 PC? Read this guide, and you will know how to do it.
To transfer data to iCloud, there should be enough storage space. You can upload any of your data to iCloud, including pictures, then download them to your PC if you like. iCloud provides 5GB of free storage space, so if the size of your photos is more than the provided free space, you should upgrade iCloud storage. Here is how to transfer pictures from iPhone to a flash drive via iCloud:
Step 1: Go to "Settings" on your iPhone and enter your Apple ID. If you aren't logged in, enter the Apple ID together with its password and tap "Sign in".
Step 2: Choose "iCloud" > "Photo", and enable the switch for "iCloud Photo Library". Provided Wi-Fi is connected, pictures on your device will be uploaded to your iCloud account.
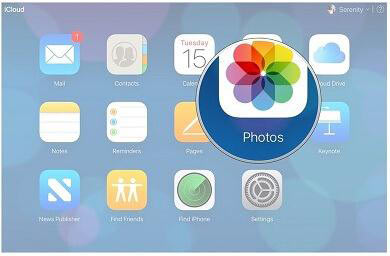
Step 3: Download, then open iCloud on the computer, and log into iCloud with your Apple ID email and password. Next, tap the "Photos" application.
Step 4: Choose the picture you wish to download by holding down the "Ctrl" key on Windows or the "Command" key on Mac and tap on every picture you wish to download. Next, connect the flash drive to the computer, and copy the image file you imported into the computer to the flash drive.
Read also: Can you move photos from a Mac computer to an Android device? If you want, learn these 5 flexible ways.
Windows PCs have an in-built function known as File Explorer that can help you view and manage data in your drives and devices. You can still use this function to transfer your photos from your iPhone to a flash drive by following the below steps:
Step 1: Connect the iPhone, unlock it, and tap "Trust" to grant the computer access to your pictures. Then take your USB drive and connect it to the same computer, then create a new folder to store your photos.
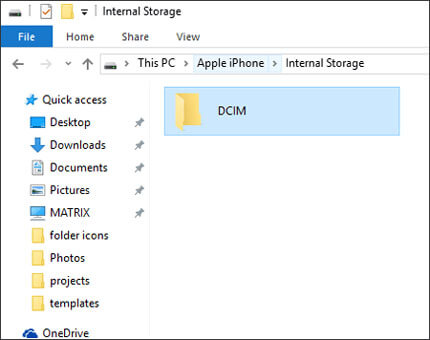
Step 2: Navigate to "This PC", and you'll see a gadget named xxx iPhone.
Step 3: Click on the iPhone name twice, open the "Internal storage" and look for the "DCIM" folder. Preview your pictures and choose the ones to transfer from iPhone to flash drive through copy and paste.
Further reading:
9 Google Photos Alternatives: Manage Photos and Videos Easily
How to Recover WhatsApp Photos in Android with 4 Methods (Ultra Guide)
Photos App is also great software to transfer pictures from an iPhone to a flash drive on a computer. The best thing is that you can use it on both Mac and Windows computers. It's pretty easy to use. But, you can only transfer Camera Roll pictures from your iPhone to Mac and Windows 7,8,10,11 computers.
Step 1: Connect the iPhone to Mac PC using a USB cable. Ensure you have the latest version of iTunes on your Mac computer.
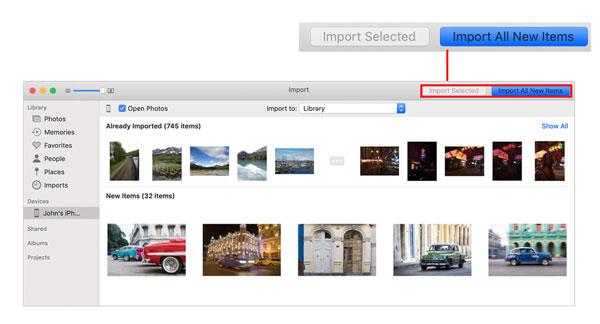
Step 2: The Photos app will launch automatically on the computer, but you can still open it manually. After that, tap on the "Import" option, choose the pictures you wish to transfer, and click the "Import Selected" option.
Step 3: Connect your flash drive to the computer. Look for "Finder" and open it. Then run on another Finder window and, go to the "Pictures" option, open its folder. Copy and paste your photos to a USB flash drive.
Step 1: Connect your iPhone to the computer and unlock it. After that, tap "Trust" on your iOS device.
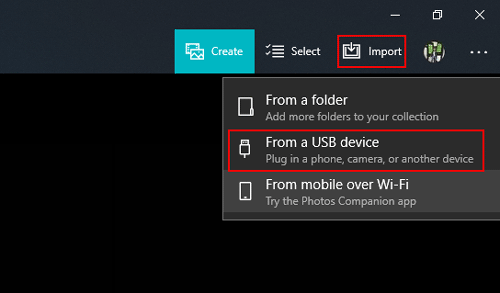
Step 2: Tap "Import" and choose "From a USB device". Photos App will then start to detect pictures on the iPhone.
Step 3: Choose pictures you do not wish to import since the new pictures will be selected automatically, then tap "Import Selected". Once the operation completes, you may see them in the Pictures folder.
Step 4: Insert a USB flash drive into the USB port, and copy then paste the images into the drive.
Transfer of pictures can also be done through iTunes. But, it's a roundabout way as you have to export the pictures to the PC first, then import them from iTunes to the flash drive. Here is how to import photos from iPhone to a USB stick through iTunes:
Step 1: Install the iTunes latest version on the computer, and connect the iPhone to the computer using a USB cable. When asked, click the "Trust" option on the phone to trust the computer.
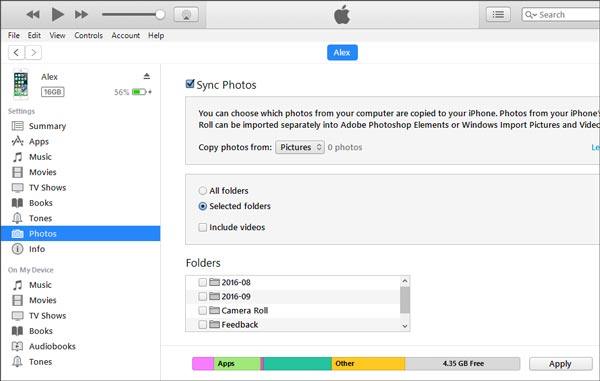
Step 2: iTunes will detect your iPhone fast. Please click the "iPhone" icon at the top left after finishing the authorization on iTunes.
Step 3: Choose the "Photos" category, check "Sync Photos", and tap the "Apply" icon. Then your iPhone photos will be synced to your computer.
Step 4: Connect your USB stick to the computer, and drag and drop the images from the iTunes folder to your stick.
If you have a USB adapter, it will be very easy to transfer pictures from the iPhone to a flash drive. You don't need a computer to carry out this process. In fact, this is also one of the easiest ways of transferring data from an iPhone to a flash drive.
Step 1: Make sure you have installed the Files app on your iPhone. If not, you can install it from App Store.
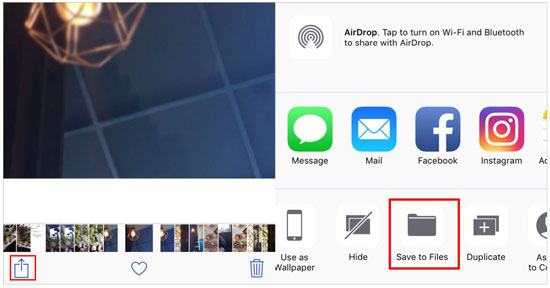
Step 2: Connect the flash drive to the full-size end of the adapter, and plug the USB-C end into the phone. Then go to the "Photos" App on the iPhone, and select the files you want.
Step 3: Click the "Share" icon, scroll up the screen, and choose the "Save to Files" option. Then you can move the photos to the USB stick via the Files app.
Transferring pictures from your iPhone to a flash drive will free up more space in your device. For those who don't know how the transfer of photos from iPhone to computer is done, this guide will help a lot. With software like iPhone Transfer, you'll easily save your photos to a flash drive as it's capable of copying files at once.
Related Articles
How to Recover Deleted Photos from LG Phone with 3 Professional Solutions
Transfer Files from Android to USB Flash Drive with or without OTG
How to Transfer WhatsApp Backup from Google Drive to iCloud? Complete It in 3 Steps
Best Transfer - Transfer Files from Android to PC Using USB Cable in 6 Ways
[5 Best Ways] How to Transfer Music from iPhone to Android in Ease
[Fast Transfer] How to Transfer Your Photos from iPhone to Android Effectively?
Copyright © samsung-messages-backup.com All Rights Reserved.