There are countless reasons for transferring photos from a phone to a computer. Whether for backing up the photos for safekeeping, exporting the snaps to edit them on a large display, or just creating more space on your mobile phone, learning how to transfer photos from phone to computer is vital. This guide will show you quick methods to achieve that. Quickly, let's jump into it.
Below are the methods to import photos from Android to a computer. Check them out:
This photo transfer - Samsung Messages Backup, is the best tool to transfer photos between Android devices and computers. You can move all photos in 1 click, and selectively copy the pictures you want. It won't damage the photo quality, so you can get the original images on your computer. Plus, you can use it to transfer your Android music, videos, contacts, videos, and more.
As long as the OS on your Android device is Android 4.0 and upper, the software can be perfectly compatible with the device. Thus, it supports most Android phones and tablets.
- 1 click photo transfer from Android to a computer.
- Support selective transfer of photos, videos, SMS, music, etc.
- Create new albums to organize your photos by category.
- Allow Android data backup and restore.
- Manage your Android data with multiple features.
Download this Android photo transfer software.
Step 1: Open the tool after installing it and press "Android Assistant" from the toolbox.
Step 2: Plug in the phone to the computer with USB and enable USB debugging.
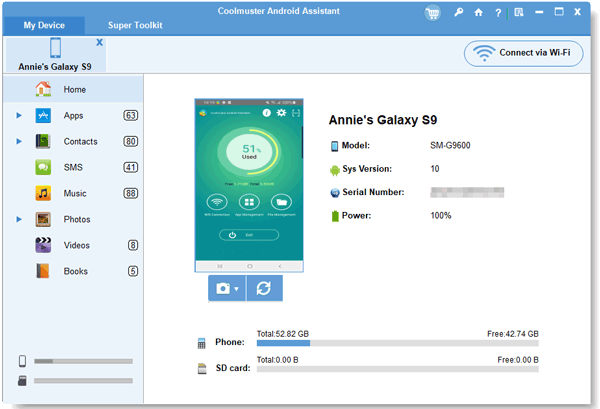
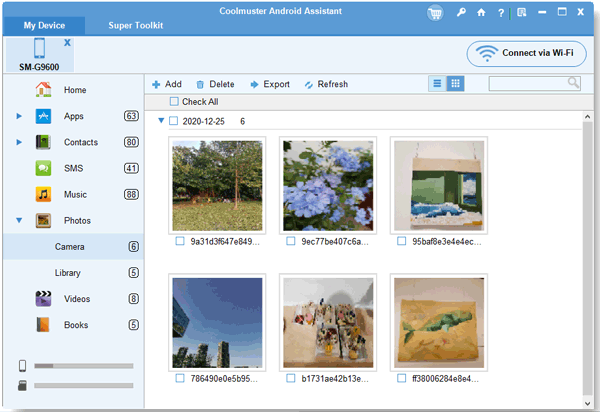
Step 3: Choose the "Photos" button from the left menu. You will see all photos in the phone displayed in the primary interface. Choose the images to transfer to the computer and tap the "Export" tab.
This is one of the easiest and most common ways to share pictures from Android to computer. You just need a USB to link both devices and transfer as many pictures as possible.
The best part is that the USB connection is secure and consistent. However, it may take longer to transfer files this way. In addition, this technique will not work efficiently if the PC's USB ports are destroyed.
Step 1: Connect the Android device to your PC with your original USB charging wire.
Step 2: Next, click on USB notification from the phone's notification window and choose "File transfers".
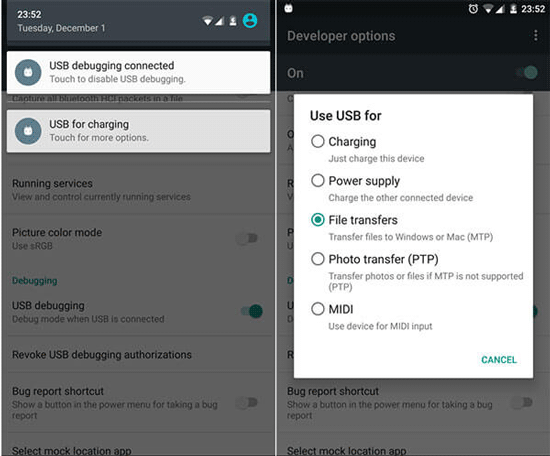
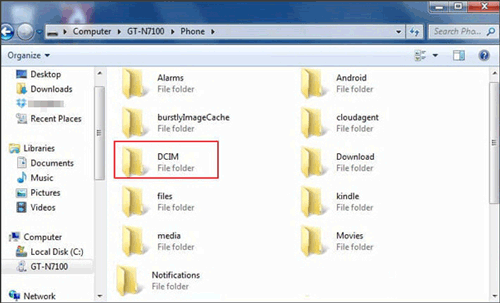
Step 3: Finally, tap on the name on the name of your phone from the PC and head to the internal storage. Find the "DCIM" folder. Then choose the pictures you intend to transfer on the computer.
Learn more: Recover Permanently Deleted Photos on Android with/without Backup
Google Photos has changed the way it manages pictures. This app lets you conveniently transfer pictures from a mobile phone to a computer. The time it takes to move a photo depends on the type of picture you are transferring.
With its Storage saver option, you will efficiently keep a couple of pictures in to cloud safely and access them on any device. You just have to upload your pictures from your Android phone to Google Storage and download them to your computer.
Step 1: Head to the Google Photos app on your Android smartphone, and log in with your Google account.
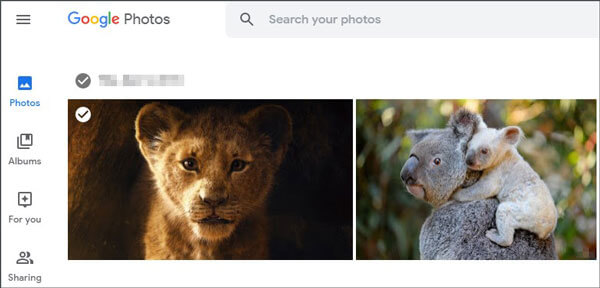
Step 2: Click "Plus" to choose "Upload", and select the photos you want from your phone. Then the app will save the uploaded images on your Google account.
Step 3: Open Google Photos on your computer using a browser, and sign in with the same account. Then download the synced photos to your computer.
Maybe you like: Tutorial: Recover Permanently Deleted Photos from Google Photos Safely
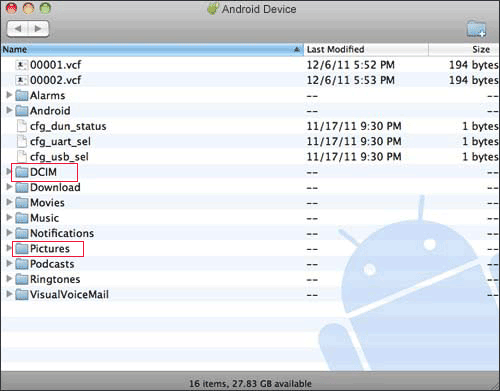
Unlike Windows, Mac PCs do not support data transfer to and from Android devices with the Finder application. Therefore, to copy pictures from Android to Mac, you need to download an Android file transfer application on your Mac.
Step 1: Install the Android File Transfer application on the Mac. Launch the Android file transfer app with the Mac Finder application.
Step 2: Connect an Android phone to a Mac with a USB cord.
Step 3: Next, open the folder to save the picture data you wish to move from the phone to your preferred location on your Mac computer.
We will show you several commonly used methods to move pictures from an iPhone to a Windows or a Mac computer. Select a method that is easier to implement and suits your needs.
If you need a quick solution to copy many iPhone pictures to computers without quality loss, iPhone Transfer is an ideal option. It provides different photo transfer options to suit your specific needs. This transfer software also supports transferring various videos, music, SMS, and so on, from an iOS device to a computer. If you want to back up your iPhone data to your computer, it will help.
- Back up & restore data on iPhone in just a click.
- No quality loss while transferring files.
- Transfer photos, contacts, videos, etc., from an iPhone to a computer with ease
- Allows data preview before exporting.
- Supports various iPhone models, such as iPhone 14/14 Pro/14 Pro Max/14 Plus/13/13 Pro/12/11, etc.
Download this iOS photo transfer software.
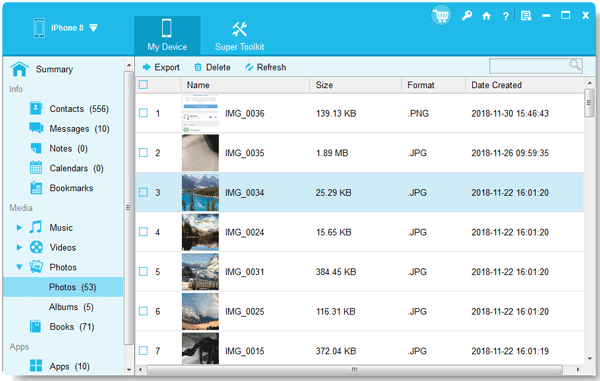
Step 1: Run the tool on a computer after downloading it. Connect an iPhone to a computer with USB.
Step 2: The tool will automatically detect the linked iPhone, and a popup will appear. Click the "Trust" option and continue to proceed.
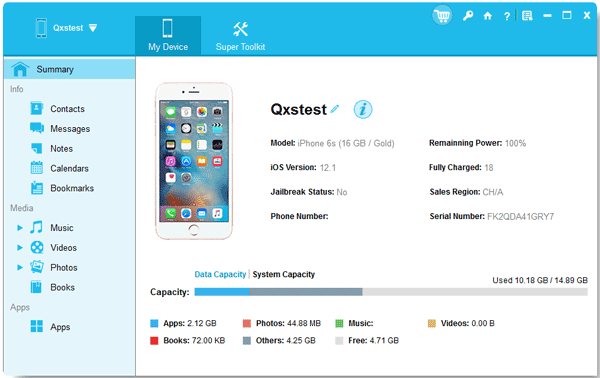
Step 3: Choose the "Photos" button from the left panel to see the photos in your phone displayed on the main interface. Tap the "Export" tab to copy from the iPhone to the computer.
Perpahs you need: Wonder How to Not Transfer Photos to New iPhone? Solutions Are Here
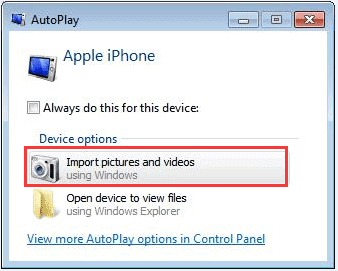
AutoPlay is an impeccable feature on Windows computers that supports data transfer from iPhones to computers. Since you won't find an option to use the Photos app on Windows 7 PCs and other versions, you can use AutoPlay.
Step 1: Plug the iPhone into the PC using a USB. Tap "Trust", then enter your passcode when asked.
Step 2: Next, an AutoPlay box will show up. Tap "Import pictures & videos" on the window.
Step 3: Choose a folder in "Camera Roll" by tapping "Browse". After that, hit the "OK" button to exit.
Step 4: Finally, tap Import, and then wait for the final result.
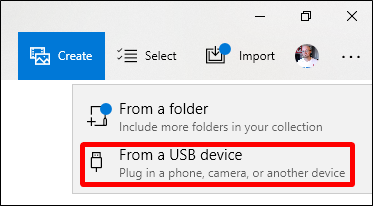
Windows 10 and 8 devices have a built-in tool called Windows Photos app that enables users to import their pictures from iPhone devices to PCs.
Step 1: Link the iPhone to the PC, then unlock it. Tap Trust, then enter your password if asked.
Step 2: Tap the "Import" button, then choose "From a USB device". Afterward, it'll automatically recognize the pictures on your iPhone, and you only need to wait a few minutes.
Step 3: Choose the pictures you do not want to transfer; all new pictures will be selected by default. Tap on "Import" to transfer your photos to the computer. When the process finishes, you'll find the images in the Photos folder.
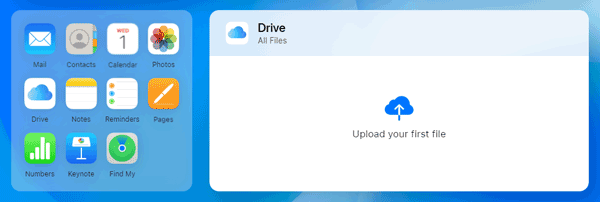
If you don't want to install third-party tools on the PC, iCloud can be the best option. This cloud-based storage works like a hard drive, only that it is online. You don't require a USB; the procedure is done wirelessly.
However, you only have 5GB of free space, which may not be sufficient. Despite that, iCloud is worth trying if you want to move files regularly.
Step 1: First, open the Settings application, head to "Photos" and "iCloud Photos", and toggle on this option.
Step 2: Launch a browser on your computer and visit the iCloud website. Log into your account with the correct Apple ID and passcode.
Step 3: Tap on the "Photos" option and choose the pictures you want to download. From there, click on the "iCloud" button using the downward arrow.
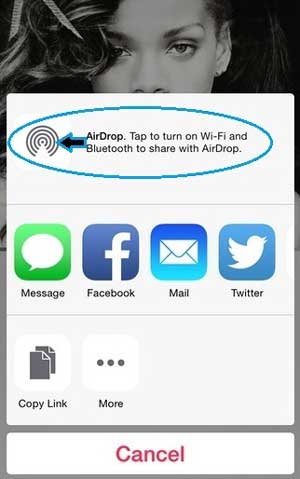
AirDrop is Apple's designed service that can help transfer various data and photos between Apple devices. It's another impeccable solution to copy photos from an iPhone to a Mac without a USB.
Step 1: First, you should enable "Bluetooth" and "Wi-Fi" on both devices.
Step 2: Head to the "Photos" app and select the pictures to be transferred. Click the "Share" icon and choose your Mac. Your photos will be quickly shared from the phone to the Mac computer.
That is how you can transfer photos from a phone to a computer. These methods are very simple to follow and enable you to transfer your precious snaps without difficulty.
For Android, you can choose the Android transfer tool - Samsung Messages Backup. It supports most Android data transfer between your Android device and computer. For iOS, you can pick the iPhone Transfer software. This program can transferm back up and restore iPhone photos and other iOS data efficiently.
Related Articles
How to Move Photos/Pictures to SD Card on Android in 4 Simple Ways?
Discover Secret: How to Recover Photos from Lost Phone Without Backup
9 Google Photos Alternatives: Manage Photos and Videos Easily
Transfer Contacts from LG Phone to Computer in 6 Ways [Solved]
Tutorial on Texting from Computer to Cell Phone (Hassle-free)
How to Uninstall Apps on Android Phone from Computer Easily? (The Easiest Way)
Copyright © samsung-messages-backup.com All Rights Reserved.